Android中通过代码进行截图的方法形形色色,甚至我们可以看到Vysor通过截图能够流畅的在Chrome应用上展示手机,今天我们结合一些文章进行整理整理。
方案一. View.getDrawingCache()
- 基本原理: 获取绘制的缓存,前提要将缓存开启
- 局限性: 但是前提是要拿的到对应的View,因此一般是应用内截图
- 其他缺陷: webview内的内容无法截取
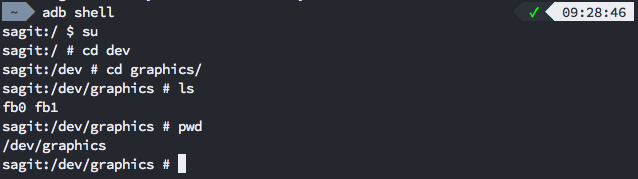
方案二. 读取/dev/graphics/fbn
- 基本原理: Linux中每帧的缓冲(framebuffer)存储在
/dev/graphics/fbn - 局限性: 需要system权限,因此需要root设备
- 其他缺陷: 读取出来的画面需要转换为rgb才能正常显示
方案三. 反射调用系统截图函数
低版本是Surface.screenshot()、高版本是SurfaceControl.screenshot()
- 基本原理: 系统对内提供的截图的函数
- 局限性: 该方法是
@hide,因此对外不可见,并且其中SurfaceControl也是隐藏的,因此从用户代码中即便是通过反射也无法获取这个类。因此只能通过重新编译一套sdk或者在源码环境下编译apk,这样就只能在特定的ROM下运行。
方案四. adb shell下执行screencap -p xxx.png或者screenshot xxx.png
- 基本原理: 系统提供通过
adb的截图 - 局限性: 需要
adb权限或系统权限
- 基本原理: 通过
VirualDisplay虚拟一块屏幕,然后可以录制与截取屏幕内容 - 局限性: Android 5.0之后才新增该API,使用前需要征得用户同意
方案六. Vysor的方案
Vysor是比较特殊的情况,其主要是通过adb的权限,实时对手机进行截图:
1. 在Apk中编写main函数与截图方法
编写入口方法,并且不断往端口中送不断截图的数据流:
1
2
3
4
5
6
7
8
9
10
11
12
13
14
15
16
17
18
19
20
21
22
23
24
25
26
27
28
29
30
31
32
33
34
35
36
37
38
39
40
41
| public class Main {
static Looper looper;
public static void main(String[] args) {
AsyncHttpServer httpServer = new AsyncHttpServer() {
protected boolean onRequest(AsyncHttpServerRequest request, AsyncHttpServerResponse response) {
return super.onRequest(request, response);
}
};
Looper.prepare();
looper = Looper.myLooper();
System.out.println("Main has been launched!");
AsyncServer server = new AsyncServer();
httpServer.get("/screenshot.jpg", new AnonymousClass5());
httpServer.listen(server, 53516);
Looper.loop();
}
static class AnonymousClass5 implements HttpServerRequestCallback {
public void onRequest(AsyncHttpServerRequest request, AsyncHttpServerResponse response) {
try {
Bitmap bitmap = ScreenShotFb.screenshot();
ByteArrayOutputStream bout = new ByteArrayOutputStream();
bitmap.compress(Bitmap.CompressFormat.JPEG, 100, bout);
bout.flush();
response.send("image/jpeg", bout.toByteArray());
return;
} catch (Exception e) {
response.code(500);
response.send(e.toString());
return;
}
}
}
|
在客户端代码中通过反射Surface或SurfaceControl通过其中的函数进行截图:
1
2
3
4
5
6
7
8
9
10
11
12
13
14
15
16
17
18
19
20
21
22
23
24
25
| public class ScreenShotFb {
public static Bitmap screenshot(IWindowManager wm) throws Exception {
String surfaceClassName;
Point size = SurfaceControlVirtualDisplayFactory.getCurrentDisplaySize(false);
if (VERSION.SDK_INT <= 17) {
surfaceClassName = "android.view.Surface";
} else {
surfaceClassName = "android.view.SurfaceControl";
}
Bitmap b = (Bitmap) Class.forName(surfaceClassName).getDeclaredMethod("screenshot", new Class[]{Integer.TYPE, Integer.TYPE}).invoke(null, new Object[]{Integer.valueOf(size.x), Integer.valueOf(size.y)});
int rotation = wm.getRotation();
if (rotation == 0) {
return b;
}
Matrix m = new Matrix();
if (rotation == 1) {
m.postRotate(-90.0f);
} else if (rotation == 2) {
m.postRotate(-180.0f);
} else if (rotation == 3) {
m.postRotate(-270.0f);
}
return Bitmap.createBitmap(b, 0, 0, size.x, size.y, m, false);
}
}
|
2. 服务端通过adb调用客户端代码
让Apk中的入口类可见:
1
| export CLASSPATH=/data/app/cn.dreamtobe.screenrecord-1/base.apk
|
然后使用app_process(如果有app_process32就用app_process32)运行入口main方法:
1
| exec app_process /system/bin cn.dreamtobe.screenrecord.Main '$@'
|
这样就可以使用adb的权限使用SurfaceControl.screenshot()或Surface.screenshot()进行不断截图了。