在前面的文章 ,我们提到了kotlin的基本语法、为什么选用kotlin、根据《Effective Java》Kotlin语法层面的优化、kotlin单元测试编写以及kotlin对包大小影响、kotlin与Java对比运行时性能 等,今天我们谈谈在Kotlin 1.1引入的强大且实用的Coroutines,本文详细介绍了Coroutines的概念与常见的使用场景。
I. 引入Coroutines 首先,Coroutines是一个单独的包,如果你是普通Java开发者,建议使用官方的教程 进行引入,如果你和我一样是Android开发者,建议直接使用Anko-Coroutines ):
本文所有案例均在kotlin 1.1.4与kotlinx-coroutines-core 0.18版本进行实验(由于我引入anko时,anko引用的coroutines时0.15版本因此这里引入0.18版本进行替换(至于为什么高版本会自动替换低版本可以参考这篇文章 ))。
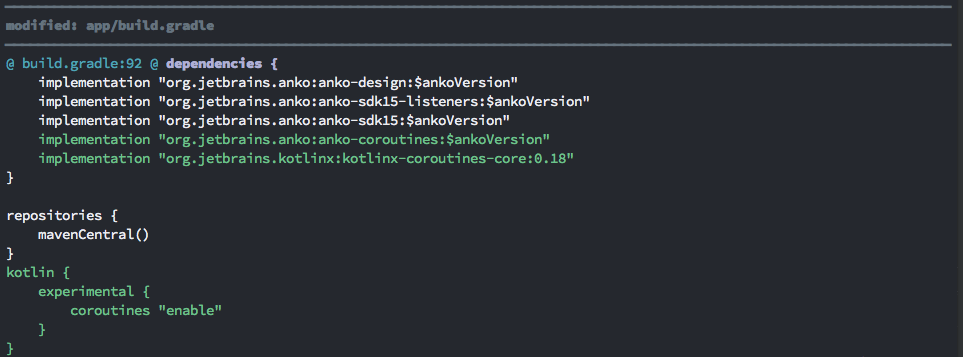
从kotlin 1.3起,coroutine已经进入了1.0并且不再是experimental了,相关引入如下, 我们直接参照kotlinx.coroutines 中,进行引入:
1
2
implementation "org.jetbrains.kotlinx:kotlinx-coroutines-core:1.0.1" implementation 'org.jetbrains.kotlinx:kotlinx-coroutines-android:1 .0 .1 '
简单案例 我们使用kotlin 1.0.1版本做一个简单的案例,案例中我们在主线程中异步的执行一个耗时操作,然后再在最后弹一个Toast:
首先引入上面提到的kotlinx-coroutines-core与kotlinx-coroutines-android 两个依赖,然后在MainActivity中:
1
2
3
4
5
6
7
8
9
10
class MainActivity : AppCompatActivity () {override fun onCreate (savedInstanceState: Bundle ?) super .onCreate(savedInstanceState)5000 ) }.await()this @MainActivity , "finish async job but not block main thread" , Toast.LENGTH_LONG).show()
II. 什么是Kotlin Coroutines Coroutines中文名”协程”,简单来说就是使用suspend来代替线程阻塞,可以理解为无阻塞的异步编写方式,基本原理是使用更轻的协程来代替繁重的阻塞操作(为什么阻塞是繁重的,可以参考这篇文章 ),并且复用原本阻塞的线程资源。
综合C#、Lua等中的Coroutine对于suspend的翻译,文中为了便于理解,将suspend的操作(如delay)称为”挂起”。kotlin协程的挂起是十分廉价的,相反的线程的阻塞是十分昂贵的。
协程中每个coroutine都是运行在对应的CoroutineContext中的,为了便于理解,文中将CoroutineContext称为”coroutine上下文”。而coroutine上下文可以是为coroutine提供运行线程的CoroutineDispatcher(如newSingleThreadContext创建的单线程coroutine上下文、CommonPool公共的拥有与CPU核实相当线程数的线程池等),可以是用于管理coroutine的Job、甚至可以是继承自Job的可以为异步任务带回数返回值的的Deferred等。
Kotlin协程的特征 我们知道协程的概念并不是kotlin第一个提出的,在此之前已经有很多语言有协程的概念,但是kotlin协程有自己的特征:
koltin的协程完全是通过编译实现的(不愧是IDE公司出的^ ^),没有修改JVM或者是底层逻辑 相比其他语言的协程,kotlin的协程可谓非常的全面,其不仅支持C#和ECMAScript的async/await、Go的channels与select,还支持C#和Python的build sequence/yield等 本质 本质上,协程是在在用户态直接对线程进行管理,不同于线程池,协程进一步的管理了不同协程切换的上下文,协程间通讯,协程的挂起,相对于线程而言,协程更轻;在并行逻辑的发展进阶过程中,可以理解为进程->线程->协程。
下图我根据源码理解画的kotlin协程中对挂起的基本实现:
带来的好处 通过协程我们可以很简单的使用async来让原本需要使用异步+回调的编写方式,可以通过看似同步的编写方式写代码 提供多种线程间通信的方式,如channel,以及延伸出的producer、pipeline等 在多协程(原本的线程)管理方面更加灵活,如通过多个协程绑定同一job进行全局管控 减少了所需要的线程数,由于使用协程的概念在用户态接管线程,完成各协程的调配,通过挂起代替阻塞,有效利用闲置的线程资源。 可能带来的问题 目前kotlin协程还处在试验期 生搬硬套会使得代码更加复杂 在一些场景上使用协程使得反复利用使用同一个线程,反而多核处理器的优势无法发挥 需要注意 我们可以通过目前kotlinx.coroutines所在包名(kotlin.coroutines.experimental)获知目前kotlin协程还是实验性的,并且根据官方文档,等到完全设计完成后最终API会移到kotlin.coroutines中,正因为这个原因,官方建议给基于协程API的包添加experimental后缀(如:cn.dreamtobe.experimental),等到最终发布后,再迁移到无experimental后缀的包中,并且官方表明会做兼容以最小化迁移成本。
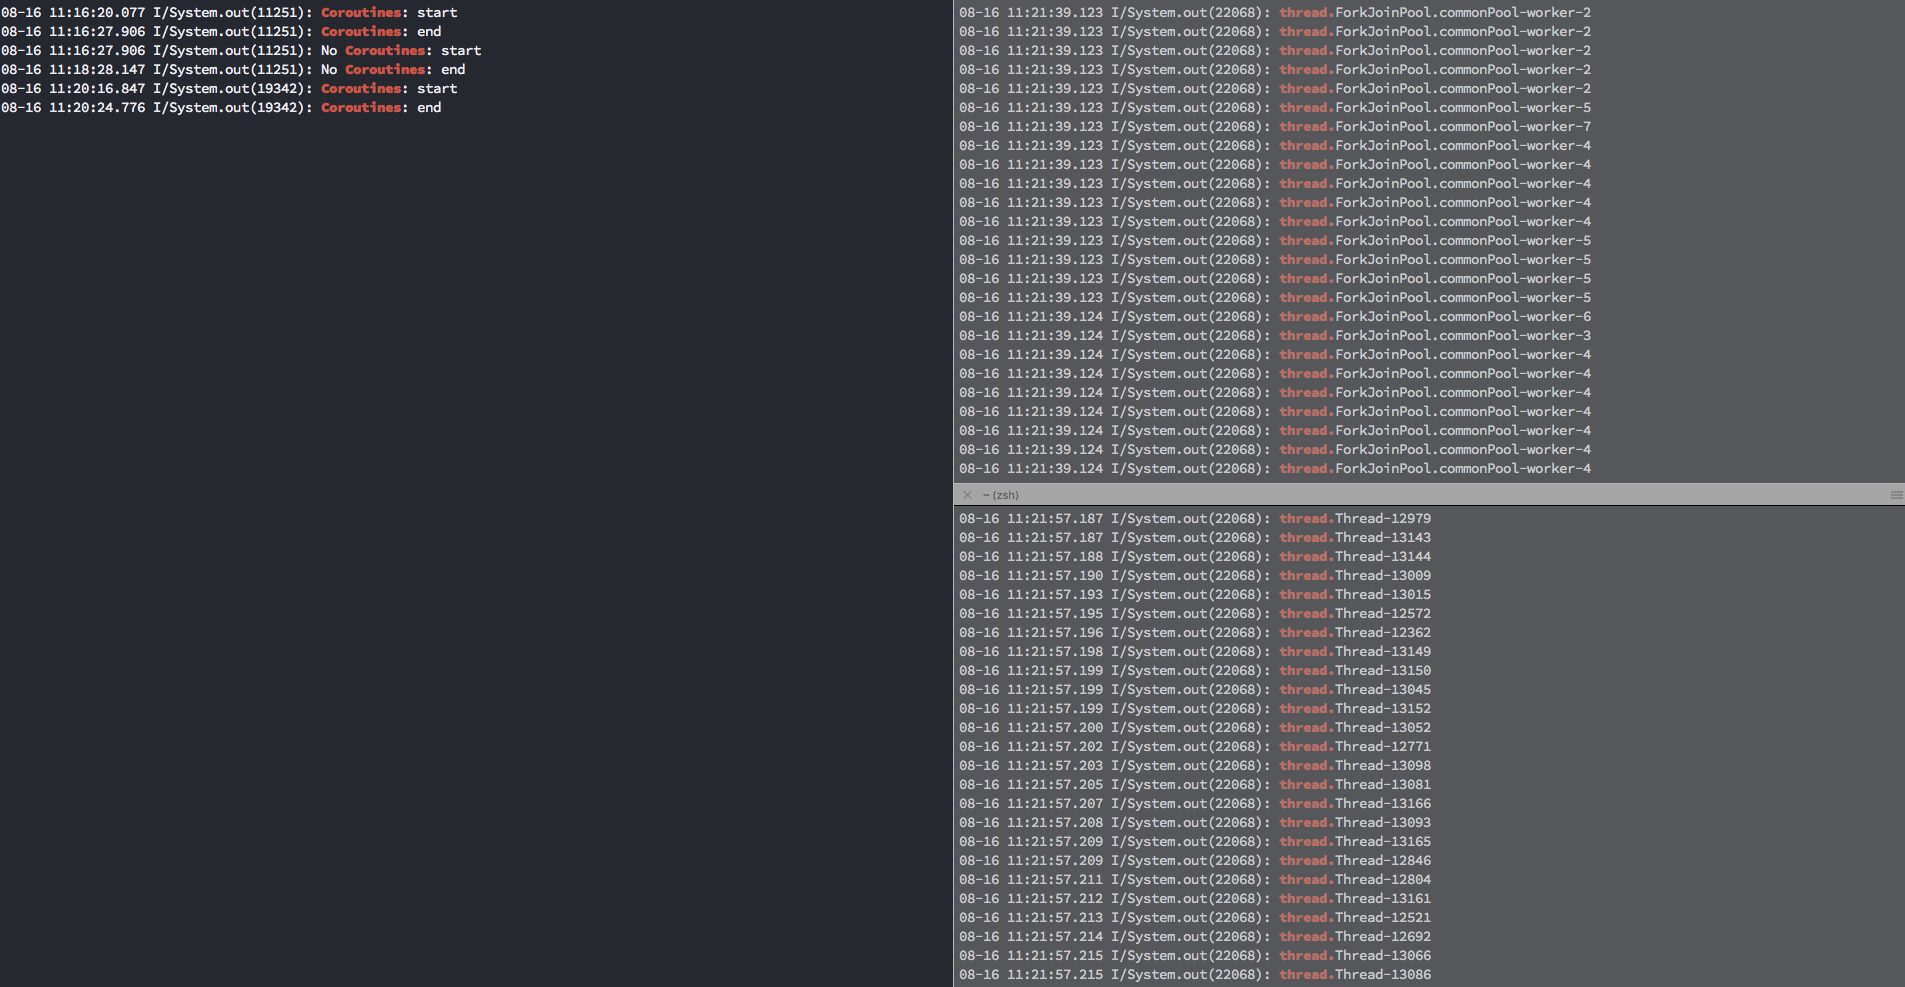
III. 挂起是很轻的操作 我测试了如下两个代码(不过其实这块代码是一个极端情况,并且是体现挂起优势的代码):
1 2 3 4 5 6 7 8 9 10 11 12 13 14 15 16 17 18 19 20 21 22 23 24 25 "Coroutines: start" )val jobs = List(100_000 ) {1000L )"." + Thread.currentThread().name)"Coroutines: end" )"No Coroutines: start" )val noCoroutinesJobs = List(100_000 ) {1000L )"." + Thread.currentThread().name)"No Coroutines: end" )
在Nexus6P上:使用协程的大约在8s左右完成所有输出;而不使用协程的大约2min才完成所有输出
这里你可能会提出,这里很大程度是复用了线程?
是的,这就是协程的特性,使用挂起当前上下文替代阻塞,使得可以复用被delay的线程,大量减少了这块的资源浪费。
而使用阻塞的情况是,不断创建新的线程然后阻塞,因此哪怕是我们使用线程池,也无法复用其中的任何线程,由于这里所有的线程都被阻塞了。如果这块不明白,可以直接使用以下的代码,让阻塞的测试用例也跑在一个尽可能提供线程复用的常规线程池中,结果相同大约2min才完成所有输出:
1
2
3
4
5
6
7
8
9
10
11
12
val noCoroutinesPool: ExecutorService = Executors.newCachedThreadPool()"No Coroutines: start" )val noCoroutinesJobs = List(100_000 ) {1000L )"thread." + Thread.currentThread().name)"No Coroutines: end" )
IV. 如何使用协程 run(CoroutineContext) { ... }: 创建一个运行在CoroutineContext制定线程中的区块,效果是运行在CoroutineContext线程中并且挂起父coroutine上下文直到区块执行完毕runBlocking(CoroutineContext) { ... }: 创建一个coroutine并且阻塞当前线程直到区块执行完毕,这个一般是用于桥接一般的阻塞试编程方式到coroutine编程方式的,不应该在已经是coroutine的地方使用launch(CoroutineContext) { ... }: 创建运行在CoroutineContext中的coroutine,返回的Job支持取消、启动等操作,不会挂起父coroutine上下文;可以在非coroutine中调用suspend fun methodName() { ... }: 申明一个suspend方法,suspend方法中能够调用如delay这些coroutine特有的非阻塞方法;需要注意的是suspend方法只能在coroutine中执行async(CoroutineContext) { ... }: 创建运行在CoroutineContext中的coroutine,并且带回返回值(返回的是Deferred,我们可以通过await等方式获得返回值)1. fun methodName(...) = runBlocking<Unit> { ... } 申明methodName方法是顶层主协程方法。一般是用于桥接一般的阻塞试编程方式到coroutine编程方式的,不应该在已经是coroutine的地方使用。
1
2
3
4
5
6
7
8
9
10
11
12
13
14
15
16
17
fun main (args: Array <String >) Unit > {val job = launch(CommonPool) {1000L )fun noRunBlocking (args: Array <String >) val job = launch(CommonPool) {1000L )
2. 在Coroutine中异步执行suspend方法 我们可以通过async在不同的Dispather提供的线程中运行以后,带回返回值,如下:
1
2
3
4
5
6
7
8
9
10
11
12
13
14
15
16
17
18
fun main (args: Array <String >) Unit > {val time = measureTimeMillis {val one = async(CommonPool) { doOne() } val two = async(CommonPool) { doTwo() } "The answer is ${one.await() + two.await()} " ) "${time} ms" ) suspend fun doOne () Int {500L )return 1 suspend fun doTwo () Int {700L )return 5
如果你希望在有使用到async结果返回值的时候再执行里面的内容(有点类似lazy),只需要在构建async的时候传入CoroutineStart.LAZY作为start就可以了,比如:
1
2
val one = async(CommonPool, CoroutineStart.LAZY) { doOne() } "${one.await()"} // 此时将会挂起当前上下文等待doOne执行完成,然后输出返回值
可以使用fun asyncXXX() = async(CommonPool) { ... } 申明一个异步的suspending方法,与launch(CommonPool)相同可以在非coroutine的区域调用。
1
2
3
4
5
6
7
8
fun asyncDoOne () fun main (args: Array <String >) val one = asyncDoOne()"${one.await()} " )
3. 为Coroutine指定不同的线程(Dispaters) 在协程中包含了很多CoroutineDispatcher ,这些Dispaters决定了Coroutine运行所在线程。比如:
Unconfined: 执行coroutine是在调用者的线程,但是当在coroutine中第一个挂起之后,后面所在的线程将完全取决于调用挂起方法的线程(如delay一般是由kotlinx.coroutines.DefaultExecutor中的线程调用)CoroutineScope#coroutineContext(旧版本这个变量名为context): 执行coroutine始终都是在coroutineContext所在线程(coroutineContext就是CoroutineScope的成员变量,因此就是CoroutineScope实例所在coroutine的线程),CommonPool: 执行coroutine始终都是在CommonPool(ForkJoinPool)线程池提供的线程中;使用CommonPool这个context可以有效使用CPU多核, CommonPool中的线程个数与CPU核数一样。newSingleThreadContext: 执行coroutine始终都是在创建的单线程中newFixedThreadPoolContext: 执行的coroutine始终都是在创建的fixed线程池中如以下案例:
1 2 3 4 5 6 7 8 9 10 11 12 13 14 15 fun main (args: Array <String >) Unit > {val jobs = arrayListOf<Job>()" 'Unconfined': I'm working in thread ${Thread.currentThread().name} " ) 500 )" 'Unconfined': After delay in thread ${Thread.currentThread().name} " ) "'coroutineContext': I'm working in thread ${Thread.currentThread().name} " )1000 )"'coroutineContext': After delay in thread ${Thread.currentThread().name} " )
输出(我们可以很清晰的看到,使用coroutineContext的始终运行在主线程,而Unconfined的在挂起后在delay的调用线程DefaultExecutor执行):
1
2
3
4
'Unconfined ': I'm working in thread main'coroutineContext ': I'm working in thread main'Unconfined ': After delay in thread kotlinx.coroutines.DefaultExecutor'coroutineContext ': After delay in thread main
在不同线程间跳跃
1 2 3 4 5 6 7 8 9 10 11 12 13 14 fun log (msg: String ) "[${Thread.currentThread().name} ] $msg " )val ctx1 = newSingleThreadContext("Ctx1" )val ctx2 = newSingleThreadContext("Ctx2" )"Started in ctx1" )1000L )"Working in ctx2" )1000L )"Back to ctx1" )
输出:
1
2
3
[Ctx1] Started in ctx1[Ctx2] Working in ctx2[Ctx1] Back to ctx1
run方法使得运行在父coroutine,但是是在Ctx2线程中执行区块,以此实现线程跳跃。
4. 对于Job的取消操作 我们知道launch返回回来的是一个Job用于控制其coroutine,并且我们也可以通过coroutineContext[Job]在在CoroutineScope中获取当前Job对象。
而对于Job的取消操作可以理解为类似线程中的Thread.interrupt(),我们可以通过Job#cancel对job进行取消。
需要特别注意的是默认的delay等都可以被取消的(delay对CancellationException默认的处理方式就是直接中断所有操作达到被取消的目的),但是如果我们自己做一些逻辑操作,或者是select等没有做取消检查,取消是无效的,最简单的方法是检查CoroutineScope#isActive,在coroutine中都可以对其进行访问。 如:
1
2
3
4
5
6
7
8
9
10
11
fun main (args: Array <String >) Unit > {val job = launch(CommonPool) {while (isActive) {
对父coroutine进行取消,除了取消了coroutine本身,还会影响使用其CoroutineScope#context的子job,但是不会影响使用其他CoroutineContext的job,如:
1 2 3 4 5 6 7 8 9 10 11 12 13 14 15 16 17 18 19 20 21 22 23 val request = launch(CommonPool) {val job1 = launch(CommonPool) {"job1: I have my own context and execute independently!" )1000 )"job1: I am not affected by cancellation of the request" )val job2 = launch(coroutineContext) {"job2: I am a child of the request coroutine" )1000 )"job2: I will not execute this line if my parent request is cancelled" )500 )1000 ) "main: Who has survived request cancellation?" )
输出(其中没有使用父coroutineContext的job1不受父coroutine取消的影响):
1
2
3
4
job1: I have my own context and execute independently!job2: I am a child of the request coroutinejob1: I am not affected by cancellation of the requestmain: Who has survived request cancellation?
4.1 对于Job取消以后的处理 比如对delay之类的suspending期间,被取消了,我们应该如何捕捉到进行相关处理呢,这块可以直接使用try{ ... } finally { ... }进行捕捉处理。
但是需要注意的是,一般来说对于已经取消的Job是无法进行suspending操作的,换句话说,你在上面提到的finnaly { ... }再做suspending相关操作会收到CancellationException的异常。
不过如果非常特殊的情景,需要在已经取消的Job中进行suspending操作,也是有办法的,那就是放到run(NonCancellable) { ... }中执行,如:
1
2
3
4
5
6
7
8
9
10
11
12
13
14
15
16
17
fun main (args: Array <String >) Unit > {val job = launch(CommonPool) {try {1000 ) { i ->finally {1000L )
5. 多个CoroutineContext进行+操作 这块具体可以参看CoroutineContext#plus操作实现。
coroutine中支持多个CoroutineContext进行+操作,使得一个coroutine拥有多个CoroutineContext的特性。
5.1 CoroutineContext + CoroutineDispatcher 如果使用+将CoroutineContext与CoroutineDispatcher相加,那么当前Coroutine将运行在CoroutineDispatcher分配的线程中,但是生命周期受CoroutineContext影响,如:
1
2
3
4
5
6
7
8
val request = launch(ctx1) {val job = launch(coroutineCotext + CommonPool) {1000L )
5.2 CoroutineDispatcher + CoroutineName 当然也可以使用+将CoroutineDispatcher与CoroutineName相加,那么便可以给当前Coroutine命名。
5.3 CoroutineContext + Job 我们可以使用+将CoroutineContext与Job对象相加,使得Job对象可以直接管理其coroutine,如:
1
2
3
4
5
6
7
val job = Job() val coroutines = List(10 ) {
一个比较常见的常见,我们可以为Activity创建一个job,所有需要绑定Activity生命周期的coroutine都加上这个job,在Activity销毁的时候,直接使用这个job.cancel将所有coroutine取消。
6. 对Coroutine进行超时设计 可以在协程方法内,通过withTimeout或者withTimeoutOrNull创建一个一段时间还没有完成便会自动被取消的Coroutine。
其中withTimeout在超时的时候,会抛出继承自CancellationException的TimeoutException,如果超时是被允许的,你可以通过实现try { ... } catch ( e: CancellationException ) { ... }在其中做超时之后的操作(比如释放之类的),或者是直接使用withTimeoutOrNull。
7. 线程安全 通常我们在多个线程同时共享同一个数据的时候,是存在线程安全问题的,如:
1 2 3 4 5 6 7 8 9 10 11 12 13 14 15 16 17 18 19 20 21 22 23 24 25 var counter = 0 fun main (args: Array <String >) Unit > {"Counter = $counter " )suspend fun massiveRun (context: CoroutineContext , action: suspend () -> Unit ) val n = 1000 val k = 1000 val time = measureTimeMillis {val jobs = List(n) {"Completed ${n * k} actions in $time ms" )
上面的案例我们在CommonPool线程池中对counter并行执行了100万次的自增,理论上coutiner最终值应该是1000000,但是由于多线程同时访问,使得该最终值不符合预期:
1
2
completed 1000000 actions in 1308 msCounter = 680574
7.1 加上volatile 假如我们给coutiner加上volatile呢?
1
2
@Volatile var counter = 0
我们会发现 依然无法保证 这里的线程安全问题,由于volatile变量只能保证对该变量线性的一个读写操作(这块的具体原理可以参考Java Synchronized机制 这篇文章)进行保证,这里的案例大量的原子操作是volatile无法保证的:
1
2
completed 1000000 actions in 1440 msCounter = 676243
7.2 使用同步 1 2 3 4 5 6 7 8 9 private val lock = Any()fun main (args: Array <String >)
使用synchronized或是ReentrantLock显然是可以的,虽然操作很小,但是由于高并发的一个线程加锁,使得运行效率极低,全程消耗了11.687s:
1 2 completed 1000000 actions in 11687 msCounter = 1000000
7.3 使用Mutex进行挂起 1 2 3 4 5 6 7 8 9 10 11 val mutex = Mutex()var counter = 0 fun main (args: Array <String >) Unit > {try { counter++ }finally { mutex.unlock() }
类似于Java的ReentrantLock,Mutex不同的是不是采用阻塞,而是采用Coroutine的挂起代替阻塞,在一些场景下是非常实用的,不过在这里并没有想象中那么好,甚至比synchronized阻塞还差很多(48.894s),由于每一个操作都是很小的颗粒度,导致挂起线程资源很难有被利用的场景:
1 2 completed 1000000 actions in 48894 msCounter = 1000000
7.4 使用线程安全数据结构 1 2 3 4 5 6 7 private val counter = AtomicInteger()fun main (args: Array <String >)
其实这个案例的 最佳方案 便是使用支持原子操作incrementAndGet的AtomicInteger来代替线程锁达到线程安全,我们发现保证了线程安全并且只需要需要1.568s左右便完成了通过线程锁需要11.687s的工作(相差了7倍之多!):
1 2 completed 1000000 actions in 1568 msCounter = 1000000
7.5 使用线程约束这边的并发颗粒度 1 2 3 4 5 6 7 8 9 10 11 12 val counterContext = newSingleThreadContext("CounterContext" )var counter = 0 fun main (args: Array <String >) Unit > {
这里我们使用一个单线程的context来约束这个自增操作,这个方案也是可以的,但是 并不可取 ,原因是每一个自增都需要从CommonPool的上下文切换到单线程的上下文,这是累计起来是非常开销的操作,虽然最终的答案符合预期,但是总耗时达到了22.853s之多:
1 2 completed 1000000 actions in 22853 msCounter = 1000000
7.6 线程合并 1 2 3 4 5 6 7 8 9 val counterContext = newSingleThreadContext("CounterContext" )var counter = 0 fun main (args: Array <String >) Unit > {
这个其实是一个权衡方案,类似这个案例,本身Action中的所有操作就是存在线程安全的需求,那么考虑不要使用多线程,直接改为单线程操作,结果中规中矩:
1 2 completed 1000000 actions in 3113 msCounter = 1000000
7.7 使用Actor 1 2 3 4 5 6 7 8 9 10 11 12 13 14 15 16 17 18 19 20 21 22 23 24 25 26 sealed class CounterMsg // 这里我们刚好使用sealed class 来定义,定义一个CounterMsg object IncCounter : CounterMsg() class GetCounter (val response: CompletableDeferred<Int >) : CounterMsg() fun counterActor () var counter = 0 for (msg in channel) { when (msg) {is IncCounter -> counter++ is GetCounter -> msg.response.complete(counter) fun main (args: Array <String >) Unit > {val counter = counterActor() val response = CompletableDeferred<Int >()"Counter = ${response.await()} " )
Actor是一个coroutine的结合,所有的参数可以定义与封装在这个coroutine中,并且通过channel与其他coroutine进行通信,由于Actor本身就是一个coroutine的结合,因此无论Actor运行在哪个CoroutineContext下面,Actor本身都是运行在自己的courtine中并且这是一个顺序执行的coroutine,因此我们可以用它来做线程安全的一些操作,因此在这个案例中这个是可行的,并且由于它始终都运行在同一个coroutine中不需要进行context切换,因此性能比前面提到的Mutex更好。
1 2 completed 1000000 actions in 14192 msCounter = 1000000
当然对于Actor的使用,这个案例中我们简单的通过编写方法来生成一个Actor,但是复杂的情况最好是封装为一个类。
8. 通信 8.1 Channels 协程中可以通过Channel进行通道模式的在不同coroutine中传递数据,可以发送、接收、关闭等操作,并且对于接收者来说Channel是公平的,也就是先receive的会优先收到send的推送,其余的挂主住等待,而Channel又分有缓冲区的与无缓冲区的。
8.1.1 公平的Channel 对于接收者来说Channel是公平的,也就是先receive的会优先收到send的推送,下面是一个很经典的打乒乓球的例子:
1 2 3 4 5 6 7 8 9 10 11 12 13 14 15 16 17 18 19 20 data class Ball (var hits: Int )fun main (args: Array <String >) Unit > {val table = Channel<Ball>() "ping" , table) } "pong" , table) } 0 )) 1000 ) suspend fun player (name: String , table: Channel <Ball >) for (ball in table) { "$name $ball " )300 )
输出:
1 2 3 4 5 ping Ball(hits =1)hits =2)ping Ball(hits =3)hits =4)ping Ball(hits =5)
这个案例利用了公平的Channel机制:
receive队列 发送触发者 选手一 桌子 选手二 选手一 选手一 选手二 选手二 选手一 … … 桌子 选手x
8.1.2 无缓冲区Channel 如果send先执行,会挂起直到有地方receive,如果receive先执行会先挂起直到有地方send,如:
1 2 3 4 5 6 7 8 9 10 11 12 13 14 15 16 fun main (args: Array <String >) Unit > {val channel = Channel<Int >()for (x in 1. .5 ) channel.send(x * x)3 ) { println(channel.receive()) }for (y in channel) println(y)"Done!" )
8.1.3 有缓冲区Channel 如果receive先执行并且缓冲区中没有任何数据会先挂起,如果send先执行了,会一直send直到缓冲区满了才挂起(类似BlockingQueue),如:
1 2 3 4 5 6 7 8 9 10 11 12 13 14 fun main (args: Array <String >) Unit > {val channel = Channel<Int >(4 )10 ) {"Sending $it " )1000 )
输出(缓冲了4个,并且尝试发第5个):
1 2 3 4 5 Sending 0 Sending 1 Sending 2 Sending 3 Sending 4
8.2 Producer 生产消费者模式,可以创建生产者,以及进行消费调用,如:
1 2 3 4 5 6 7 8 9 10 11 fun produceSquares () Int >(CommonPool) {for (x in 1. .5 ) send(x * x)fun main (args: Array <String >) Unit > {val squares = produceSquares()
8.3 Pipeline 管道模式,可以先创造一个生产者,然后对生产结果进行加工,最后对加工结果进行消费调用,如:
1 2 3 4 5 6 7 8 9 10 11 12 13 14 15 16 17 18 fun produceNumbers () Int >(CommonPool) {var x = 1 while (true ) send(x++) fun square (numbers: ReceiveChannel <Int >) Int >(CommonPool) {for (x in numbers) send(x * x)fun main (args: Array <String >) Unit > {val numbers = produceNumbers() val squares = square(numbers) for (i in 1. .5 ) println(squares.receive())
下面是利用pipeline计算前6位素数的案例:
1 2 3 4 5 6 7 8 9 10 11 12 13 14 15 16 17 18 19 20 21 22 fun numbersFrom (context: CoroutineContext , start: Int ) Int >(context) {var x = startwhile (true ) send(x++)fun filter (context: CoroutineContext , numbers: ReceiveChannel <Int >, prime: Int ) Int >(context) {for (x in numbers) if (x % prime != 0 ) send(x * x)fun main (args: Array <String >) Unit > {var cur = numbersfrom(context, 2 )for (i in 1. .6 ) {val prime = cur.receive()
整个计算素数的过程是一直在增加过滤器,抽象的流程如下:
1 2 3 4 5 6 7 8 9 10 11 12 // numbersFrom(2 ) -> filter(2 )2 3 %2 != 0 send 3 3 )3 4 %2 == 0 , 5 %2 != 0 ; 5 %3 != 0 ; send 5 5 )5 6 %2 == 0 , 7 %2 != 0 ; 7 %3 != 0 ; 7 %5 != 0 ; send 7 7 )7 8 %2 == 0 , 9 %2 != 0 ; 9 %3 == 0 ;// 10 %2 == 0 , 11 %2 != 0 ; 11 %3 != 0 ; 11 %5 != 0 ; 11 %7 != 0 ; send 11 11 )11 12 %2 == 0 , 13 %2 != 0 ; 13 %3 != 0 ; 13 %5 != 0 ; 13 %7 != 0 ; 13 %11 != 0 ; send 13 13
上面都是pipeline的一些案例,实际使用过程中,我们通常会用于一些异步的事务处理等。
9. Select Select可以从多个正在挂起的suspension方法中选择最先结束挂起的。
9.1 对channel消息的接收进行选择其一 我们可以使用select来同时接收多个channel,并且每次只选择第一个到达的channel:
1 2 3 4 5 6 7 8 9 10 11 12 13 14 15 16 17 18 19 20 21 22 23 24 25 26 27 28 29 30 31 32 33 34 35 fun channel1 (context: CoroutineContext ) while (true ) {300 )"channel1" )fun channel2 (context: CoroutineContext ) while (true ) {100 )"channel2" )suspend fun selectFirstChannel (channel1: ReceiveChannel <String >, channel2: ReceiveChannel <String >) Unit > { fun main (args: Array <String >) val channel1 = channel1(coroutineContext)val channel2 = channel2(coroutineContext)5 ) {
输出:
1 2 3 4 5 channel2 nnel2 nnel1 nnel2 nnel2
可以看到结果是符合预期的,由于receive操作本身如果没有数据到达就会挂起等待,因此通过这种方式,我们可以有效每次只选择先到达的一个,而无需每次都等待所有的channel被send。
上面的案例当channel被close的时候,select会抛异常,我们可以通过onReceiveOrNull让channel被close时,立马接收到null的值来取代抛异常:
1 2 3 4 5 6 7 8 9 10 11 12 13 14 15 16 17 18 19 20 21 22 23 24 25 26 27 suspend fun selectAorB (a: ReceiveChannel <String >, b: ReceiveChannel <String >) if (value == null )"Channel 'a' is closed" else "a -> '$value '" if (value == null )"Channel 'b' is closed" else "b -> '$value '" fun main (args: Array <String >) val a = produce<String>(coroutineContext) {4 ) { send("Hello $it " ) }val b = produce<String>(coroutineContext) {4 ) { send("World $it " ) }8 ) {
输出:
1 2 3 4 5 6 7 8 a ->'Hello 0' a ->'Hello 1' b ->'World 0' a ->'Hello 2' a ->'Hello 3' b ->'World 1' 'a' is closed'a' is closed
从中可以看到两条结论:
当同时有消息过来的时候,优先处理在select区块中上面的onReceive 当判断到channl已经close时,会里面返回null而不会继续进行下一个onReceive处理,如案例中输出了两个Channel 'a' is closed,就是第7次与第8次循环时判读到a.onReceiveOrNull发现a已经close了,因此哪怕b还有消息可以接收也立即在a.onReceiveOrNull中立即返回了null而不继续b的接收处理 下面的案例在同一个select中通过onReceiveOrNull与在onAwait中的receiveOrNull来对async返回的Deferred进行选择:
1 2 3 4 5 6 7 8 9 10 11 12 13 14 15 16 17 18 19 20 21 22 23 24 25 26 27 28 29 30 31 32 33 34 35 36 37 38 39 40 41 42 43 44 45 46 fun switchMapDeferreds (input: ReceiveChannel <Deferred <String >>) var current = input.receive() while (isActive) { val next = select<Deferred<String>?> { if (next == null ) {"Channel was closed" )break else {fun asyncString (str: String , time: Long ) fun main (args: Array <String >) Unit > {val chan = Channel<Deferred<String>>() for (s in switchMapDeferreds(chan))"BEGIN" , 100 ))200 ) "Slow" , 500 ))100 ) "Replace" , 100 )) 500 ) "END" , 500 ))1000 ) 500 )
输出:
1 2 3 4 BEGIN END
9.2 对channel消息的发送进行选择其一 我们可以使用select来同时管理多个channel的发送,并且每次只选择第一个有人在接收的channel:
1 2 3 4 5 6 7 8 9 10 11 12 13 14 15 16 17 18 19 20 21 22 23 fun produceNumbers (side: SendChannel <Int >) Int >(CommonPool) {for (num in 1. .10 ) { 100 ) Unit > {fun main (args: Array <String >) Unit > {val side = Channel<Int >() "Side channel has $it " ) }"Consuming $it " )250 )"Done consuming" )
输出:
1 2 3 4 5 6 7 8 9 10 11 Consuming 1 Side channel has 2 Side channel has 3 Consuming 4 Side channel has 5 Side channel has 6 Consuming 7 Side channel has 8 Side channel has 9 Consuming 10 Done consuming
总的来说,Kotlin的协程可以应用的场景非常的宽泛,也非常的实用,从对线程阻塞这块资源利用的出发点,衍生出各种各样的实用场景,如果能够灵活使用,将能编写出更优质,更高效的代码,本文只是通过Kotlinx.coroutines的教程进行了解读,更多的细节需要通过实践来挖掘,欢迎大家多实践,多拍砖。