网件R7800 OpenWrt使用V2Ray+mKcp+透明代理完美翻墙
本文最后更新于:2023年2月11日 凌晨
本文主要介绍了基于R7800这个基于arm架构处理器的搭建openwrt以及对V2ray的安装,并适配mkcp与透明代理,其中的v2ray搭建相关理论上所有的openwrt都能够通用。
首先在路由器的选择上,网件R7800是整套高通解决方案,相比于R8000、华硕AC88U等,在散热稳定性等方面有着很大的优势,为了省事以及一步到位,趁着双十一我直接入手了R7800。下面我们就开始对R7800开始手术,最终的目标是高可定制,基于kcp协议的稳定翻墙。
顺便提一下,这货还真的大,简直可以盖住我整个MBP的键盘。

这边R7800至少目前为止没有梅林等解决方案,但是其还有各类其他选择,今天我们就刷入OpenWrt,我们可以在论坛上看到hnyman为其确实下了很多心血。
I. 刷Openwrt
首先先下载r7800-openwrt-18.06.4,下载完后我们通过以下步骤让路由器进入刷机模式并准备好刷机:
- 关闭路由器电源
- 按住复位键并接入电源,此时你会看到电源LED灯变成橙色等闪烁,接着会变为白色灯闪烁,此时可以放开复位键,路由器这时已经是进入了刷机模式
- 此时电脑通过网线连线路由器,并将IP设置为手动并修改为
192.168.1.20,掩码改为255.255.255.0,网关改为192.168.1.1 - 最后进入放置刚刚下载好的img的目录
刷入openwrt:
通过tftp进行刷入,如果你是Mac OS,可以通过brew install tftp安装tftp,如果是windows可以自行在网络上下载tftp工具。然后如图进行刷入:

通常几秒钟便完成刷机,此时路由器会自动重启并且进入openwrt。
此时记得将网络改回DHCP,便可以通过浏览器访问192.168.1.1进入Openwrt的luci页面了。
此时通过System->Administration进入管理员密码设置,设置好密码以及SSH后便完成了第一步。
II. 修改LAN IP
由于我这边的光猫也是路由,并且分配的是192.168.1.x网段,为了避免冲突,在将其接入R7800 WAN口之前,我这边将LAN IP修改为99.1,先SSH进入,然后输入:
1 | |
修改好后,就可以将光猫出来的网线接入到WAN口,接入互联网了。配置WiFi之类的比较简单这里就不说了(需要留意下802.11ac才是传统意义的5G WiFi,配置的时候可以直接选择AP到WAN)。
III. 添加HOST
这里我们可以修改host随意用一个不常用但是好记的域名访问,如果你觉得不需要可以跳过这步:
SSH进入路由器,然后修改/etc/hosts文件,添加:
1 | |
保存然后重启network服务:
1 | |
IV. LUCI中文界面配置
直接通过SSH安装opkg包(也可以在luci界面中通过System->Software中搜索uci-i18n-base-zh-cn安装):
1 | |
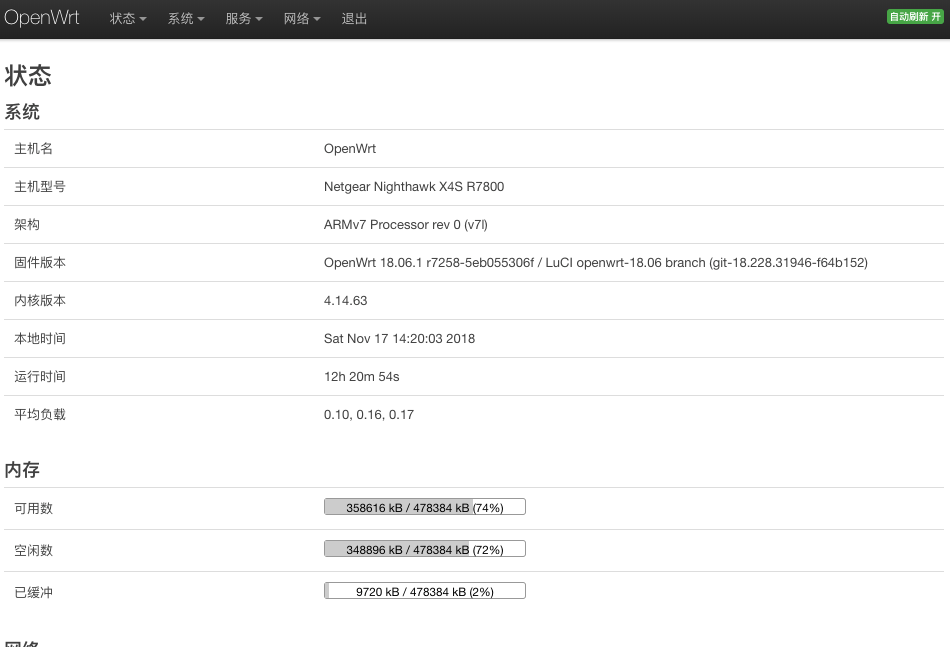
搞定后默认会切换到中文:
V. 配置系统运行日志
安装rsyslog:
1 | |
安装后,所有的运行日志都可以直接在/var/log/messages中查看了。
VI. 上V2Ray
1. V2Ray在VPS端搭建与配置
要通过V2Ray进行翻墙,首先我们需要先有一台已经配置好V2Ray的墙外的VPS,对于VPS的选择与搭建可以参看这篇文章,下面我们就假定你已经通过该篇文章配置好了VPS,配置好后,你是一个Ubuntu,ok, 我们先开始搭建VPS端:
由于针对Ubuntu,官方文档中已经有提供脚本安装,我们就直接通过该脚本进行安装即可:
1 | |
安装好后,我们对其进行配置,下面的配置/etc/v2ray/config.json文件,该文件如果不存在直接创建即可,如果存在将其内容完全替换为下面的内容,这里我们假设你使用的端口是29001,以及用于识别的UUID: xxx-xxx-xxx-xx-xxx(你可以通过这里在线生成自己的UUID并替换):
1 | |
配置好后,可以通过/usr/bin/v2ray/v2ray -test -config /etc/v2ray/config.json 来检测下配置文件的格式是否存在问题。
我们假设你使用的是29001端口,并且已经通过这篇文章设置好了通过ufw管理防火墙,因此这边需要允许该端口的访问:
1 | |
此时重启v2ray服务便完成服务端配置:
1 | |
2. V2Ray在路由器安装配置
下面假设你已经根据教程将LAN IP修改为了192.168.99.1,并且已经设置好了SSH,以及你的电脑已经有了SCP的工具。
首先由于R7800是高通ARM架构的CPU,这边我们先在这里的Release列表下载arm架构的V2Ray,比如写这篇文章的时候最新版本是v4.5.0,这里我们就直接下载这个v2ray-linux-arm.zip版本
如果需要验证,下载好后可以通过对比dgst中描述的各类信息进行比对。
然后解压缩到v2ray-linux-arm文件夹,紧接着我们通过SCP将其传到路由器的/root/v2ray的目录下:
1 | |
然后ssh进入路由器,然后按照常规的目录结构咱们来放置以及配置好V2Ray:
1 | |
除此之外/root/v2ray下面的其他文件其实我们都没有用到,可以直接删除。紧接着我们创建/etc/v2ray/config.json文件,并且将以下内容填入,这里我们假设你的VPS的IP是x.x.x.x,以及你的端口是29001、以及刚刚在VPS上你填写的UUID是xxx-xxx-xxx-xx-xxx:
1 | |
配置好后依然可以通过/usr/bin/v2ray/v2ray -test -config /etc/v2ray/config.json这个来检查配置文件是否有效,注意将其中的VPS IP修改为你的VPS IP,UUID、端口改为你之前在VPS配置好的。
紧接着我们需要生效v2ray服务:
添加文件/etc/init.d/v2ray,并填写入以下内容:
1 | |
填写好后设置其可执行的权限:
1 | |
然后我们为其激活开机启动:
1 | |
自此你可以通过以下指令先将v2ray服务启动了:
1 | |
启动后你就可以通过ps | grep v2ray看到该服务在运行了:

到这里你依然不能翻墙,除非你的电脑代理到路由器的对应1060的端口上,我们不废话,其实我们刚刚在路由器的config.json上已经配置了透明代理,只不过路由器的防火墙还没有做转发,现在我们开始配置这个转发,来完成透明代理:
配置/etc/firewall.user文件,在其中追加以下内容,需要特别注意将x.x.x.x改为你的VPS的IP:
1 | |
配置好保存后,这边我们重启防火墙服务:
1 | |
重启完成后你已经可以通过V2Ray翻墙了。
VII. DNS污染问题处理
最后我们可以稍微优化下DNS解析,防止DNS污染的问题:
先安装dnsmasq,默认情况下是已经安装了的:
1 | |
然后通过这里下载dnsmasq.d.zip文件,然后进行解压缩,解压缩后,将该dnsmasq.d文件夹放入/etc/中,完成后,对/etc/dnsmasq.conf进行配置(这里我们假设你的网关地址是192.168.99.1):
1 | |
最后通过重启dnsmasq让其生效
1 | |
自此已经完全全部配置,Have Fun!
VIII. 最后
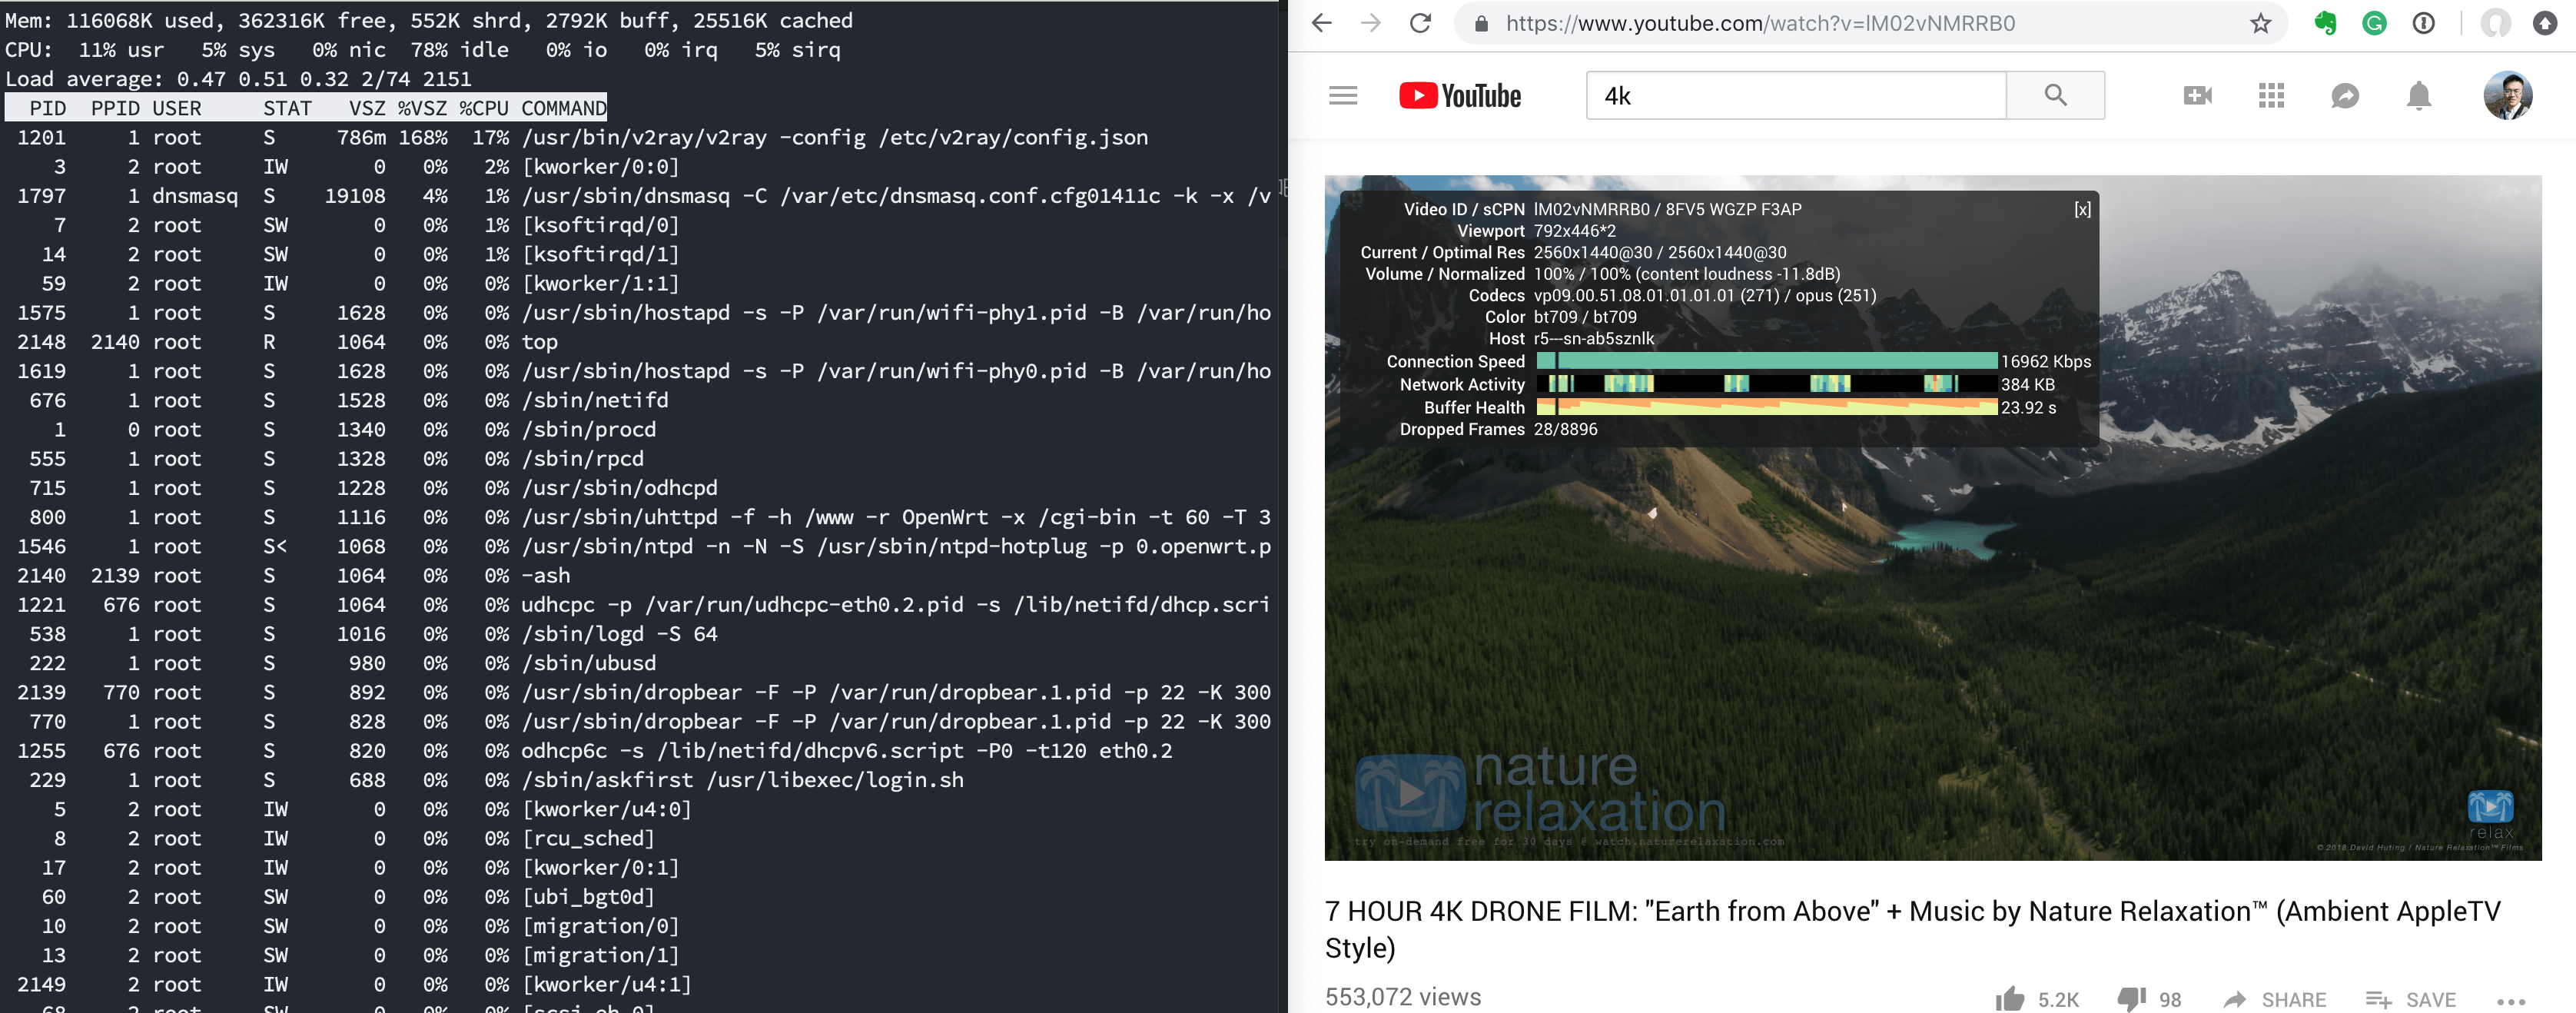
这边Youtube能够跑到1440P基本流畅不卡顿,跑下来平均速度在24.5Mbps(快的时候可以到30Mbps,慢的时候在18Mbps,80%的情况通常在22.5Mbps左右),R7800的CPU基本上被吃到10%左右,算是符合预期吧,如果你的VPS选择也是参考这篇文章应该整体下来和我差不多:
进一步优化:
由于V2Ray有各类方式可以进行伪装,这边不再需要像这篇文章中选用阿姆斯特丹,这边虽然阿姆斯特丹掉包率极低,但是由于参考这边中选用的VPS的日本东京VPS从中国电信过去是直连的,因此这边改用V2Ray后我这边便直接通过将旧的VPS打Snapshots然后恢复到新开的东京的VPS(每小时$0.007,具体如何购买可以直接参考这篇文章,改选东京即可):

并且这边针对性的对mKCP进行了优化(注意服务端与客户端两边咱们的配置文件config.json中都需要调整):
1 | |
P.S. 如果
header使用wechat-video伪装,王者荣耀等通过udp协议匹配后会直接连接失败,因此这边我们采用utp伪装为BT下载数据,dtls相关存在问题的具体原因还没有深究。
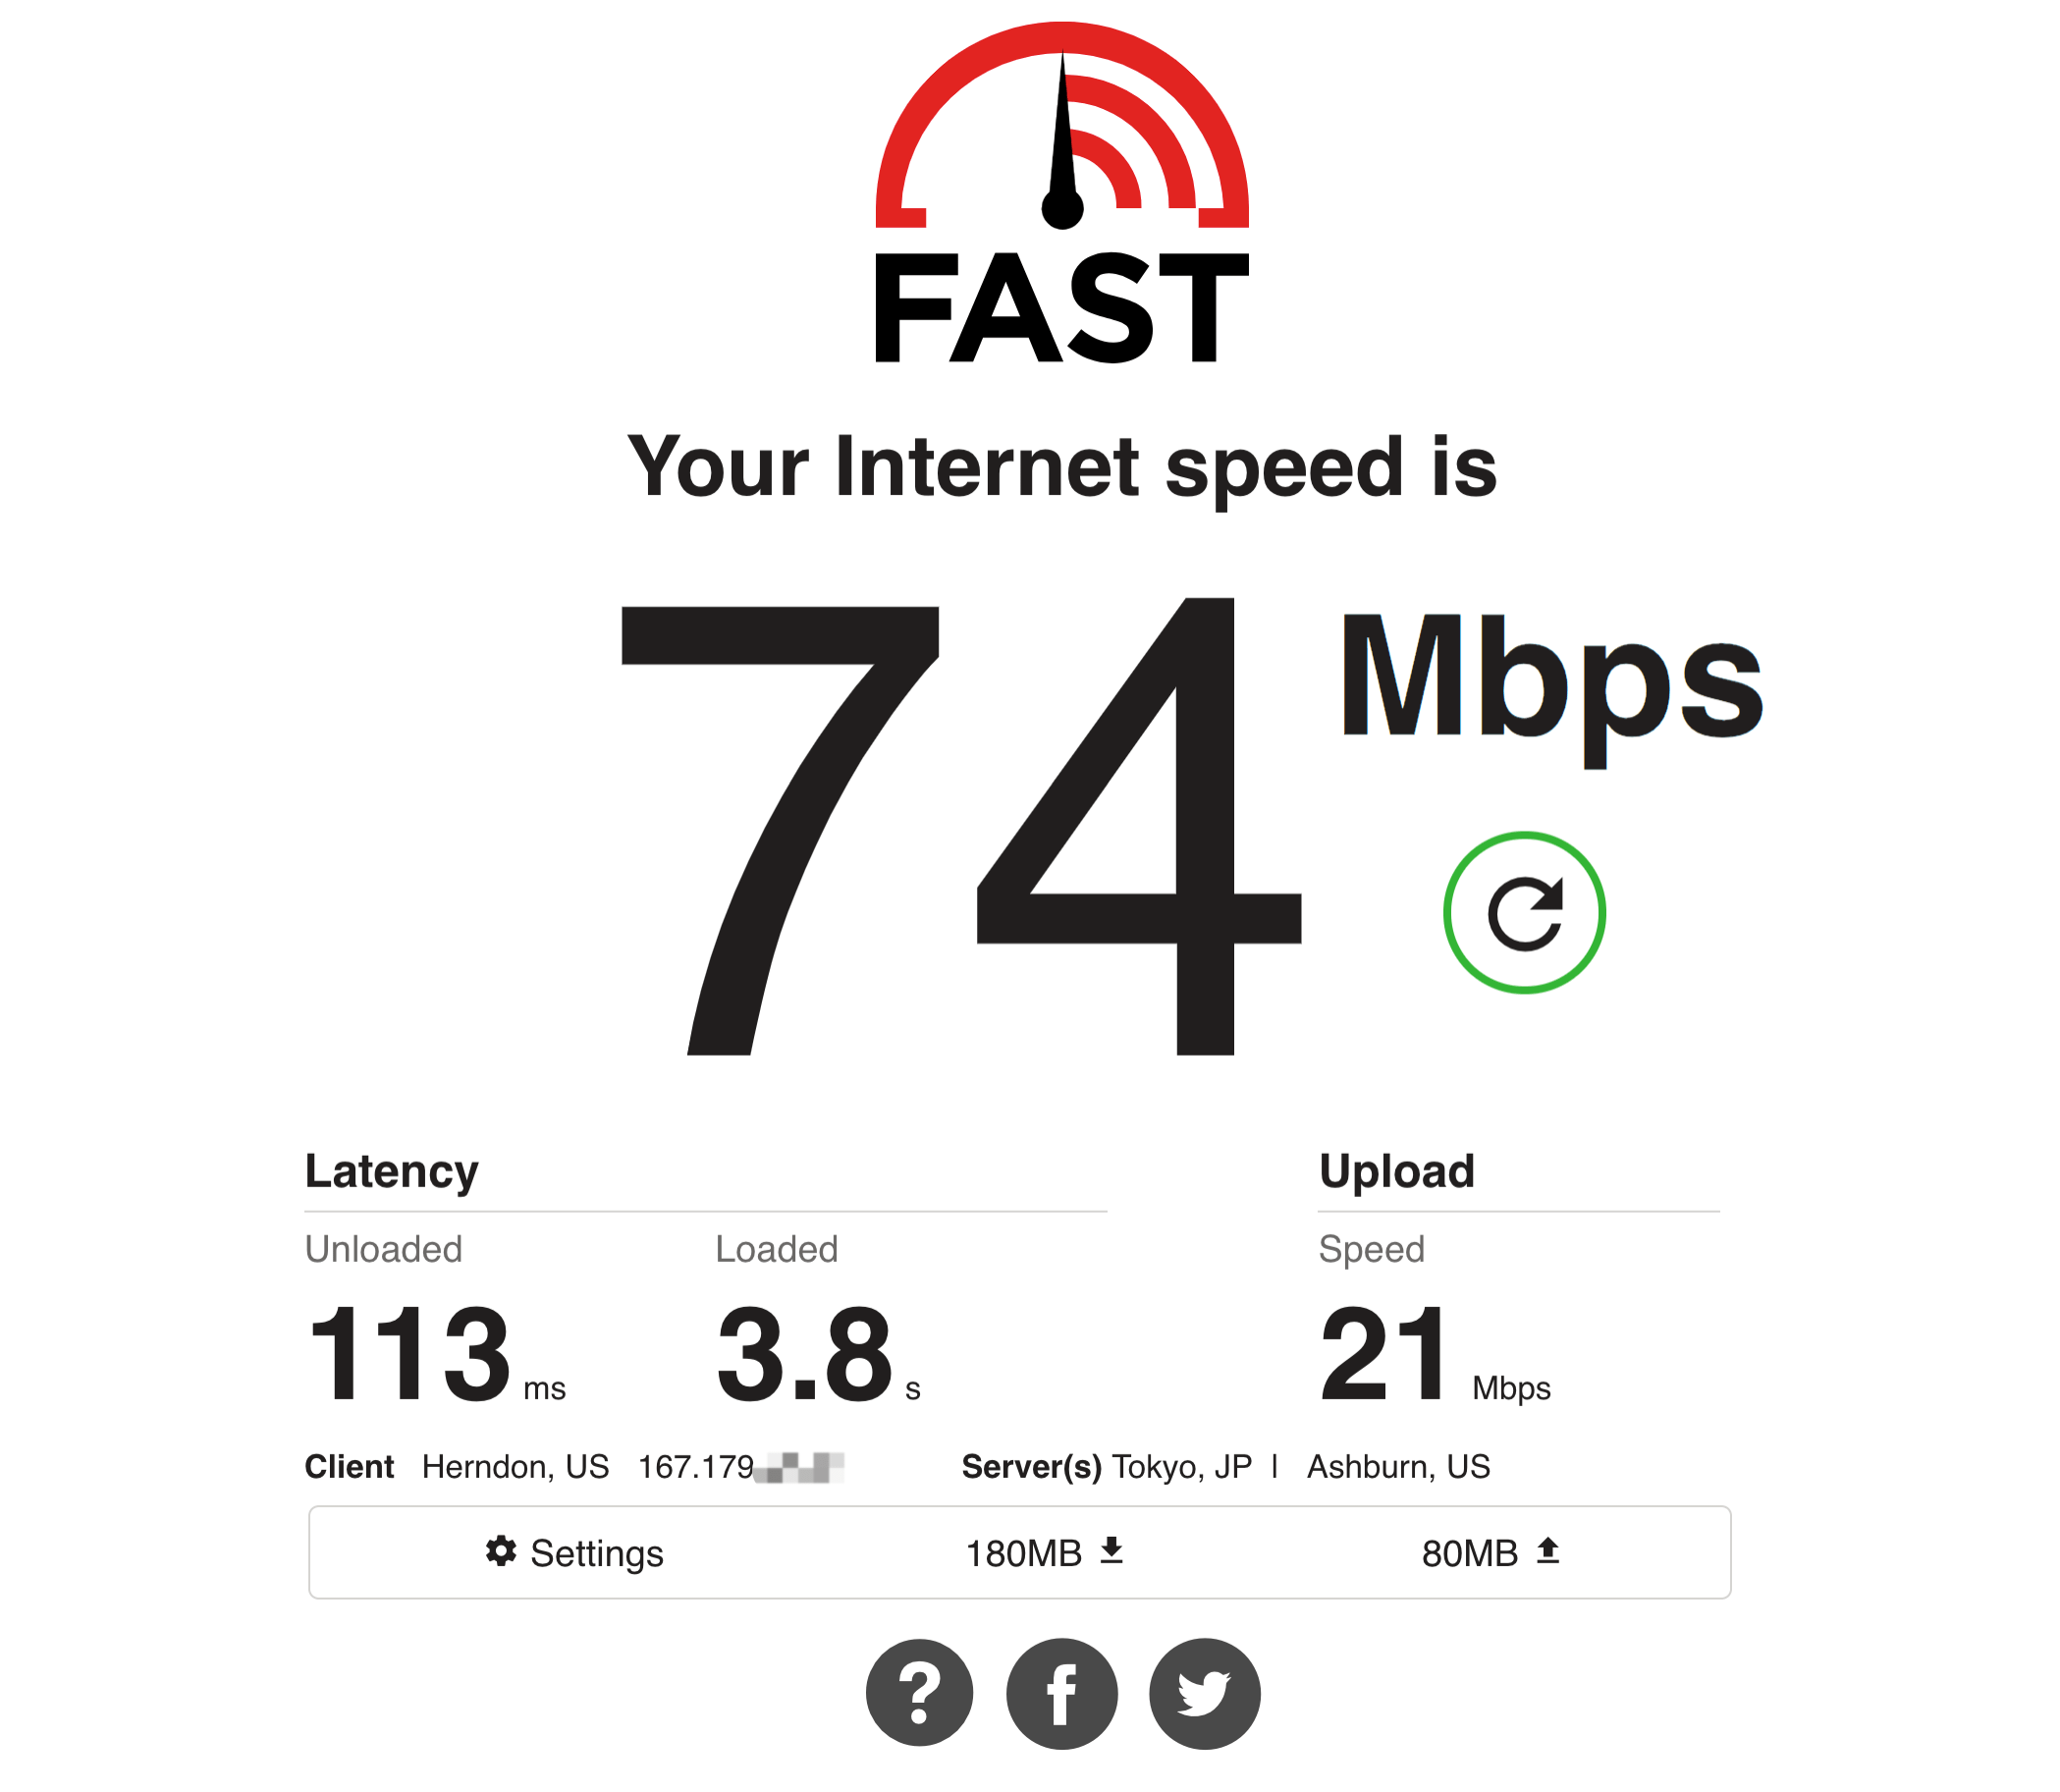
使用这篇文章的VPS换为东京后,并且如上做mKcp调整后,最终测速下来稳定在70Mbps左右: